ASCIIMath creating images

Friday, December 23, 2011

ICASSP 2012 paper(s)

View of the Kyoto Tower, image from
Wikipedia, by Bernard Gagnon
Well, the ICASSP 2012 reviews came in yesterday.  For me, there were mixed results: one paper accepted and one paper rejected.  The paper that got rejected I was really hoping for because it's my own idea and thus I would HAVE to present it (along with a brief vacation in Japan, of course!) while the other is a collaboration with a (now former) colleague, Mahmood Movassagh.  Hopefully we can both go to the conference, but we'll still have to fight it out who gets to present it. ;-)

The accepted paper is "JOINT ENTROPY-SCALABLE CODING OF AUDIO SIGNALS" by Mahmood Movassagh, Joachim Thiemann and Peter Kabal, an examination of a Huffman-coding like bit allocation that allows for scalable transmission and decoding. A key part is the joining of adjacent quantization regions which I talked about a bit in a previous post.

The rejected paper is on tonal perception applied to singing voice detection.  One positive note is that ICASSP reviews in general are very thorough and useful for making improvements.  I will continue working on the idea; perhaps ICASSP wasn't the best venue for that work anyways.  I'm now looking at ISMIR as a better place to submit the revised paper to.

Wednesday, December 21, 2011

LASERS!

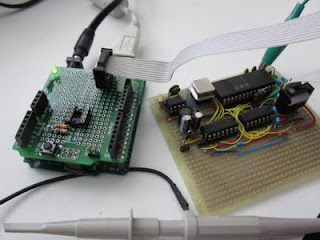
Playing with Arduino and Lasers. This is part of a SUPER SECRET!! research project with Philip Roche of the McGill Photonics Lab.
Running at low power for alignment...
FULL POWER! FOR GREAT JUSTICE!
More on this as it develops...

Thursday, December 8, 2011

A view on the first year of my blog

It's now one year since I've started this blog.  I haven't done as much blogging as I set out to do, but that was to be expected; overall there are now 27 posts (28 if you count this one), 19 of which have actual technical content.  I consider this actually pretty good, for my standards.  The trick of course is to make next year better!  I'll have to juggle that with my new life in Rennes, but it's a challenge I can rise up to!

Popularity-wise this blog has not done too badly either.  Blogger reports about 1864 hits to date; the most popular article being about my Amiga 1000 mod - though if taken together, the SIDschield articles are the main draw (this is counting individual article hits only - blogger can't show tag requests AFAICT).  The SIDshield is something I definitively will continue working on, but I think I will focus more on VHDL once I'm in Rennes.  I think I will shift my focus on the research and MATLAB related content in the future.

Weirdly, I have only ever received one comment, on Further adventures with Mercurial, which is now effectively out of date (the relevant packages on the latest Ubuntu releases are at sufficiently high versions).  It's a pity; any blog writer really likes comments, it makes one feel relevant. :-)

Onwards to the next year of posting!

Saturday, November 26, 2011

Moving my research and projects homepage

As mentioned in a previous post, I am currently finishing up my work at McGill University, and then start a postdoc with the METISS Speech and audio data modelling and processing group at the Universite de Rennes 1.  As a result, I will soon be loosing my webspace at McGill, and had to find a new home for my research descriptions and my other projects.   UPDATE: That link is long dead.

I did investigate various paid hosting methods - and for the minimal amount of traffic I have seen on my homepage, even $5/month would seem excessive.  One alternative is using Amazon to host it (Amazon S3 would probably work well) - but then I found out that bitbucket can host static websites (and it's free!) Since my website is really only about open projects (such as the SIDshield, VHDL experiments, etc. - much of which ends up on this blog, anyways) it's an appropriate site to have my page hosted there, I think.  The only other personal stuff that might need high bandwidth are pictures I like posting - and those I put on Picasa and Panoramio; trip travelogues should go to another blog.

Bitbucket webpage hosting works in a way that I really like.  It's all version controlled, of course, using Mercurial - and the server actually just displays the tip of a specific repository.  This means I can do all the editing on any computer with a clone of the repository; once I am happy with the changes I'll commit and do a "hg push" to bitbucket.  Done.  My previous webpage was also version controlled of course (subversion first, then Mercurial), but I had an extra script I needed to execute to push the new version onto the server, using a pile of scp commands.  A pain if I did't happen to want to copy the private key to the machine I'm on.  UPDATE: yeah, I'm using git now.  Like everyone else.

So, I'll try keeping it there for the time being.  It supports custom domains, then if I register a domain for myself, I can redirect it there.

Tuesday, November 22, 2011

The MATLAB code for my Thesis

To my shock and surprise, it turns out that someone other than my committee has actually been reading my thesis.  In fact, Mr. Gao Ge (高戈) of Wuhan University has been looking into my work in such detail that a typographical mistake in Eq. 5.2 was discovered: it should read
$f_m = \frac{1000}{4.37}(10^{\frac{ERB_m}{21.4}}-1)$
which he discovered by comparing the thesis with my 2007 INTERSPEECH paper. (For those of you for whom the math is not displaying correctly, that's f_m = 1000/4.37 (10^(ERB_m/21.4)-1): the exponentiation is kinda important...)  I thank Mr. Gao for his vigilance.

As part of his questions, he has asked if he could see the MATLAB code I used to do my simulations.  Now, the code was mostly over a year old, not very clean and distributed all over the file system of my computer, but I decided it's worth the effort to try to collect it all in case someone else wants to continue research in a similar direction.  And I finally sat down and did just that, and as of now, you can find it here or here.  But no, the code is still not very clean.  However, it seems to run - all you need extra AFAIK is the Signal Processing Toolbox.  You also need to supply your own mono, 16 kHz sampled wave file, which you need to point to in line 64 of RunThesisCode.m.

I'm putting this code out there under the Creative Commons Attribution 3.0 Unported License, and make absolutely no claim that this code is useable for any purpose whatsoever, nor that it is an accurate representation of what I used to run the tests.  However, I hope that the code will be useful to understand the ideas I'm trying to explain in my thesis.

Tuesday, November 15, 2011

Update: Real Life interference

I haven't been updating this blog since Real Life (tm) has this nasty habit of making me too busy to work on fun projects.

The first thing that has taken over my time is that I was recruited into being the co-instructor for the ECSE-436: Signal Processing Hardware course here at McGill.  This is actually a fun course to teach: I get to teach the kids all about C programming, actual real-world DSP usage, hardware, fixed-point arithmetic, etc.  The final project this year is to implement a simplified voice-band modem (the DSP portion only).  Not quite as cool as the projects we have had them do in previous years (when I was a TA for the course in previous years, we had them do wavetable synthesizers, guitar effect boxes and time-scale modification of speech), but due to external factors the schedule got a bit squeezed.  Still, I think the students are learning quite a bit, and I know some of them are keen to perhaps study more advanced DSP in the future.

The other major thing is that I have accepted a new job, to start in January.  Well, technically, it's a postdoc position - it's like a job, but more work and less pay.  Still, I'm looking forward to it as it is with a very good group: the METISS group at IRISA.  This of course means moving from Montreal to Rennes, France - not a simple task if you have to move an entire household and sell the house!

And while I did get two papers submitted to ICASSP 2012 (one first-author, the other second author) I am still working on a journal paper.  And I really want to get that done before we pack up to move.

I do try to squeeze a little bit of VHDL coding in here and there; as someone on the classiccmp list noted, Xilinx ISE is no longer a horrible mess on Linux, so I did install it on my main work machine (that actually has a decent amount of RAM).  So far, I was using it on an old P4 with 1 Gig RAM which was unbearably slow.  Or maybe I'm just spoiled.

One of these days I will also program the Arduino a bit again.  Real soon now.

Friday, October 7, 2011

Playing with VHDL

On my old website there are two projects using VHDL on a Spartan-3e FPGA.  Recently, I decided to get back to playing with that again.  The project goal this time was to produce a VGA output - in FPGA circles, this is by now the equivalent of a "Hello, World!" program.  Nothing new, but I felt it was important to do from scratch without copying any bits so I see how the whole thing fits together.
The Spartan 3e "S3E Sample Pack" board, a freebie I picked up a few years back.
The picture shows the board and the VGA connector: with only 4 I/O pins on one connector, I made it a monochrome (green) only interface.  The pins used are horizontal sync, vertical sync, and 2 bits of video signal.  With a bit of soldering I could make it monochrome grey, or I could add another connector to get more output lines to get real color.  For playing with synchronization, the quick and dirty adapter giving 4 intensities of green (well, 3 green plus black) is quite sufficient.  (...more...)

Saturday, September 24, 2011

A progress bar for MATLAB scripts

Here is another helpful little MATLAB script written by Prof. Kabal where I made a small modification. The script is basically a wrapper around MATLAB's  waitbar function, displaying a typical progress bar such as pretty much every program in the existence of GUIs has ever had.

Using a single function, you set it up first with
ProgressBar(Frac, Delta, Title)
where Delta or Title are optional: default values are 0.01 and an empty title. Frac is the starting fraction of completion; typically this will be 0.

You update the value with
ProgressBar(Frac)
which will only update the window if the display will change by more than Delta: So, if Delta is 0.05, the display will only be redrawn if it changes the display by more than 5%.

Finally, call the function without arguments to close the pop-out window.

I made a simple modification to check if we really have a screen to display to: if not, the update operation displays a simple percentage on stdout (also controlled by Delta). I made this modification since I tend to run tasks remotely using ssh and screen.  I found the code to check for a display here.

Get the script here: ProgressBar.m

Sunday, September 11, 2011

Real-time control of MATLAB using a MIDI controller

UPDATE 28/11/2014: this post is obsolete, I have created a better method and described it here.

Sometimes it's nice to set variables in MATLAB in real-time, using an actual physical knob.  Like you can find on a MIDI controller.
MIDI controller hooked up to my Mac
MATLAB generally is not geared for real-time data input, and to the best of my knowledge, there is no MIDI library for input.  So, I hacked up a shockingly simple way of getting controller status data into MATLAB: a small helper program passing data through the filesystem.

The helper program does very little: listen to the MIDI bus, if a controller message is seen, write it to a file in the /tmp directory.  In particular, I name the files /tmp/cc/<number>, where <number> is the controller number.  Since controllers can only take values 0–127, the files are one byte long.

The MATLAB side is equally simple.  If you want to read controller value x, open /tmp/cc/x and read the first byte.  Should the read fail, return -1,: let the calling program figure out what to do in that case (eg. read again or use the old value).  The code is simply:

function r = getCCval( n )

fname = sprintf( '/tmp/cc/%d', n );
f = fopen( fname, 'r' );
if f<0
    r = -1;
    return
end

r = fread( f, 1, 'uint8' );
fclose(f);

if isempty(r)
    r = -1;
end

end

The race condition (MATLAB reading the file while it's being written) also returns -1, given the single-byte length of the file that is sufficient.  Again, the calling program should handle it somehow.

The helper program

The actual reading of MIDI messages is messy, platform-dependent code that I'd rather not be writing myself.  So instead I use the rtmidi package, developed just on the other side of the McGill campus; it works on Mac, Linux, and Windows.  The helper program is a simple modification of the program qmidiin.cpp from the tests directory in the rtmidi distribution.

//*****************************************//
//  midicctmp.cpp by Joachim Thiemann 2011
//  modified from
//  qmidiin.cpp by Gary Scavone, 2003-2004.
//
//  read MIDI queue and create files in
//   /tmp/cc with controller state
//
//*****************************************//

#include 
#include 
#include 
#include "RtMidi.h"

#include 
#define SLEEP( milliseconds ) usleep( (unsigned long) (milliseconds * 1000.0) )

#include 

bool done;
static void finish( int ignore ){ done = true; }

void usage( void ) {
  // Error function in case of incorrect command-line
  // argument specifications.
  std::cout << "\nusage: midicctmp \n";
  std::cout << "    where port = the device to use (default = 0).\n\n";
  exit( 0 );
}

int main( int argc, char *argv[] )
{
  RtMidiIn *midiin = 0;
  std::vector message;
  int nBytes;
  double stamp;
  FILE *f;

  // Minimal command-line check.
  if ( argc > 2 ) usage();

  // RtMidiIn constructor
  try {
    midiin = new RtMidiIn();
  }
  catch ( RtError &error ) {
    error.printMessage();
    exit( EXIT_FAILURE );
  }

  // Check available ports vs. specified.
  unsigned int port = 0;
  unsigned int nPorts = midiin->getPortCount();
  if ( argc == 2 ) port = (unsigned int) atoi( argv[1] );
  if ( port >= nPorts ) {
    delete midiin;
    std::cout << "Invalid port specifier!\n";
    usage();
  }

  try {
    midiin->openPort( port );
  }
  catch ( RtError &error ) {
    error.printMessage();
    goto cleanup;
  }

  // Ignore sysex, timing, or active sensing messages.
  midiin->ignoreTypes( true, true, true );

  // Install an interrupt handler function.
  done = false;
  (void) signal(SIGINT, finish);

  // Periodically check input queue.
  std::cout << "Reading MIDI from port ... quit with Ctrl-C.\n";
  while ( !done ) {
    stamp = midiin->getMessage( &message );
    nBytes = message.size();
    if (nBytes==3) {
      char fn[20];
      if ((message[0]>>4)==11) {
        sprintf(fn,"/tmp/cc/%d",(int)message[1]);
        f = fopen(fn,"w");
        fwrite(&message[2],1,1,f);
        fclose(f);
      }
    }

    // If queue empty, sleep for 10 milliseconds.
    if (nBytes==0) SLEEP( 10 );
  }

  // Clean up
 cleanup:
  delete midiin;

  return 0;
}

The code can be compiled the same way the other program in the tests directory are compiled, on my Mac it was g++ -O3 -Wall -I.. -D__MACOSX_CORE__ -o midicctmp midicctmp.cpp Release/RtMidi.o -framework CoreMIDI -framework CoreFoundation -framework CoreAudio.  Note that the program will fail if the directory  /tmp/cc does not exists; just create it manually, or modify the above code to create it at startup.

I have not yet tested it on Linux, but I see no reason for it to not work.  I have an idea for a slightly more fancy event-based method, but that's for another post.

Tuesday, August 9, 2011

Conference Posters using LaTeX

A few students in the TSP lab have papers to present in poster sessions at INTERSPEECH 2011.  Congratulations!  In the past, the TSP Lab students used to use PowerPoint to create the posters - a bit of a kludge, and if the submitted paper was written using LaTeX, it might mean having to re-enter the equations (in addition to all the other annoyances of PowerPoint).

This pain can be avoided by doing the poster in LaTeX as well, as I did for my INTERSPEECH paper (see "Reconstructing Audio Signals from Modified Non-Coherent Hilbert Envelopes" on my research page).  I used the a0poster package, and while it can be a bit daunting at first, with a good template it's quite easy to use.  I've modified my own poster to be a small guide, with explanations: see inside the TSP Lab Template Package.  It contains the a0poster class (probably an older version), and the McGill logo.

Friday, July 22, 2011

SIDshield prototype: test results

For those interested in this project (both of you!) :-) I finished the testing of the SIDshield prototype. Summary: It works! (Yay!) but with caveats and a few fixes are needed (booo!)
Arduino (under Protoshield) with SIDshield prototype fully populated
After cleaning, visual inspection and continuity check (see yesterday's post) I found I forgot 3 wires - one to connect the grounds together, and 2 for getting the 12V to the SID chip. Thus fixed, I populated the board with all chips except for the SID and applied power. Seeing no magic blue smoke escape, I measured the 12V supply, which looked very good (without load of course) giving me ~12.4V. All other signals on the SID socket looked good so I put it in, applied power again and verified the voltages again. Same as without load.

Power Considerations
The SID needs up to 100mA on the 12V line (according to the datasheet), so about 1.2W of power. The TPS6734 has to produce that power from 5V, and thus needs to draw more than twice the current off that supply. Clearly, this is too much for a USB port, thus the Arduino must be connected to a power supply. Also take note that the barrel connector is going through a regulator with associated voltage drop (at least on my Arduino Diecimila) so your supply needs to give more than 5V.

A further complication is that the TPS6734 regulates really well for a range of input voltages; this means it has an effective negative resistance: if the input voltage drops (say, to 4V) it will draw more current; this could lower the voltage even further. We have a positive feedback loop, ending when the supply voltage drops below what the boost converter can use and we loose the 12V. Milliseconds later, the converter starts up again (since it did not draw any current and the supply recovered) and the process begins anew. Needless to say, this does not sound good on the output. So, give the poor SID a good supply!

The multimeter shows the draw on the 5V line, including the Arduino.  The scope shows the noise on the 12V line, which is 1Vp-p and about 100mV RMS.  Noise control needs to be improved.
One could argue of course that the better solution is to provide a good stable 12V supply and drop in a good old 7805 to supply the Arduino - this is why we build prototypes, right?

BTW, with all this power being sucked up, the SID gets pretty warm, I tell you...

Corrections and Changes to the Schematic
The circuit even when supplied with good power on the Arduino external power barrel connector gives a bit of noise when playing large amplitude sounds. This probably needs some resizing of capacitors when compared to the circuit given in the TPS6734 datasheet.

I also moved the reset line of the SID to a programmable (Digital Out) pin, and toggle that line in the SID library constructor.

The biggest error in the schematic posted in a previous post is that the capacitors on the input and output lines are far too small.  22pF?  I have no idea how that got in there - they need to be about .1uF!  I need to fix that on the board.

The hardware is thus effectively finished, needing just a few corrections. I will update the schematic eventually, including the boost converter. The main to-do is now some more code, especially to get steady timing, which is vital for good sounding vibrato, tremolo,  and arpeggio effects - not to mention basic song timing.

However, there are a pile of other projects I've been itching to do...

Wednesday, July 20, 2011

SIDshield prototype almost done

I've finally gotten around to doing some electronics again, and finished wiring up the full prototype of the SIDshield for Arduino.  Soldering and wiring got done yesterday, later today I will go over the whole thing very carefully to check for shorts and broken connections/wires, make sure GND and power are everywhere they're supposed to be.  Then, I will plug in everything except for the SID and apply power, to make sure the magic smoke stays in; only then will I plug in the SID since it's a not-easily-replaced chip.

Component side

It's not a "real" schield in this format, but I decided it was better to separate it from the Arduino using a ribbon cable.  Still, the whole thing is in a 8cm x 5cm rectangle.

Solder side
I'll post the results of checking and testing either tonight or tomorrow.
Update: results here.

Wednesday, July 13, 2011

Geek happiness is... a box from the parts store

My day was made this morning when I received my order from Digi-Key.  Yes, this contains the parts to finally build the real prototype of the SIDshield, including the 5V-to-12V boost converter, a 8-pin DIP chip TPS6734.  And, of course, the needed inductor, diode, and caps.  I also got the 1 MHz oscillator (ECS-2100), so the board can be completely self-standing.

What I forgot to order was the 14-pin and 8-pin sockets - but those I can get at the local store, I just have to find the time to bike there...

Wednesday, June 8, 2011

Ancient history: my first Amiga mod

Currently, I am in the process of cleaning up my collection of old computers. I came across one of the pieces I'm still quite attached to (since it was my main computer for a considerable while): my Amiga - one of those before they had model numbers (now called the Amiga 1000). One of the reasons it is special to me is because it was the first major surgery I performed on a computer, which furthermore _had_ to work since I didn't have any other computer at that time. The hack? Expand it to have 1 Megabyte of RAM.

The stock A1000 came with only 256k of RAM, and was quite famous at the time for being able to multitask in that limited environment. However, noone ever left it at that. Almost every A1000 has the added 256k expansion in the front slot, for a more usable 512k. From Commodore's perspective, that was as much as once could expand the A1000 without using the external side expansion slot.

However, if you had the guts to do it you could add another 512k inside the A1000 without a PCB.  This involved piggybacking RAM chips on the existing onboard RAM, and hacking RAS, CAS, and address lines to select the chips appropriately. This is what I did - and I have no idea where the instructions came from. A quick search of Aminet and the Fish Disk index didn't find anything. The hack was done in about 1991, if I remember correctly.

This is the inside of the A1000, with the RF shield removed. Nothing special to see except for one extra small green wire attached to the WOM (kickstart) daughterboard.
Underneath the daugtherboard, it's a bit more messy.  Note that I did label all the wires, but instead of heat-shrink tubing I used bits of electrical tape for insulation.
This shows the detail of 2 RAM chips piggybacked onto the original RAM, with a socket.
Now this is truly ugly. Obviously, I had no idea about proper electronic construction back then.  Yes, these are resistors directly soldered to IC pins.
But, 20 years later, it still works! The screen titlebar actually says "896456 free memory'
This is the only repair I have to do. The wire on the daughterboard is close to breaking off. 
How much I have learned since then... But the lesson I learned is not to be afraid of modding hardware!

Thursday, June 2, 2011

A bit of LaTeX code: placing your documents under a CC license

Distributing digital content with a Creative Commons license is usually a simple affair: decide on the license, and follow the instructions on the website to put it all in there; usually a link and a small png file.

But what if your work is a printed dead-tree document?  What is a visually appealing way to indicate your work is "free" (at least in the beer sense)?

Here is a solution at least if you use LaTeX to typeset your documents.  This was started by my supervisor, Prof. Peter Kabal, and I completed it by adding all the standard CC licenses and cleaning the LaTeX code a little.  The documentation of the package is in pdf format here.  The icons are all svg converted to eps and pdf, so nicely resolution independent.

The package could use some work to make work properly with odd paper sizes.  Email me (or comment below) if that ends up being necessary.

Wednesday, May 25, 2011

Back in Montreal

After a very nice vacation in Chile*, I am finally back in Montreal. This means that the temporary hiatus is now over. In fact I have several things to do now that my studies are officially done: write up more of my research (to get more journal publication), hunt for a job (specifically a post-doc position, for which I need a stronger publication record), deal with family issues, and general upkeep of the abode (summer came while I was away)!

And yes, it is time to get back into the whole blogging thing.  The SIDshield is on the top of this list - I'll be getting parts to add the oscillator on-board and the 5V-12V boost circuit running.  That should be good fun.

Then there is the parts of an old Yamaha CS-01 I have kicking around... that should be fun to hack with.

And there is an Amiga 1200 I'm supposed to pick up one of these days.  I'm getting it in exchange for my Amiga 3000 and a Mac SE/30, in order to reduce the size of my collection a bit, but I'll need to drive down to Vermont to get it.  Now that the weather is nice, that should happen fairly soon.  Then I can play with OctaMED again, the way it's supposed to be done.

There are many more things to keep myself occupied with.  In any case, this could be an exciting summer.  And a busy one.

(*) Chile and a bit of Argentina, too.  As mentioned in a previous post, photos are on Picasa Web here, and we are writing more detailed descriptions on a new blog here, starting with this post.

Thursday, May 5, 2011

Hiatus update: Out of Patagonia, still in Chile

A brief update about the hiatus.  I am now in Valdivia, Chile, enjoying the sunshine of the southern fall. We will be heading to Pucon next for some hiking and camping, then head for Valparaiso, then La Serena, and finally San Pedro de Atacama before heading back to Santiago and then home to Montreal.  My picasa site is being updated with pictures as we go along (yay for my Netbook!)

Pictures on Picasa Web

Monday, April 11, 2011

Hiatus update: Thesis is now on-line

A bit of an update with regard to my "hiatus" (as mentioned earlier): I have (successfully!) defended my Ph.D. Thesis and made the corrections requested by the reviewer and committee.  The thesis (A Sparse Auditory Envelope Representation with Iterative Reconstruction for Audio Coding) can be found on the homepage of the TSP lab (under "Theses", or follow the link above).  In the meantime I am in Santiago de Chile, on my way to Patagonia.  The trip details don't really fit on this blog, and besides - I plan to enjoy the hiking without worrying about writing about it!  Pictures will be on my regular website and Picasa once I'm back in Montreal.


UPDATE 2011/11/22: I have now also posted the MATLAB code for my thesis work, see the post here.


Wednesday, March 9, 2011

SIDshield on hiatus for a short time

For the few folks who have been looking at the SIDshield project, just a quick note that I will not be updating anything about it for the next few weeks.  At the end of this month (March 2011) I will be defending my Ph.D. thesis, so I need to prepare for that.  Afterwards, I'll be taking a couple of weeks of vacation, away from my tools (but closer to mountains and forests and stuff).

Once I'm back, I'll be ordering the parts to build a properly soldered prototype.

I might still make the occasional post about MATLAB, LaTeX, Python, Mercurial or whatever else takes my fancy but not too much time.

...oh, and anyone knowing of open post-doc positions with focus on audio signal processing (preferably in Europe, Canada or Australia/NZ) feel free to shoot me a line... :-)

Friday, February 25, 2011

SIDshield code updated

I have updated the code for the SIDshield, now it's actually useable to play some music in a relatively easy way.  Here is the new library, and here is a simple player with a little melody.  The player code is basically ported from the SIDcog, including the stored melody - so that remains copyright "Ahle2"! (Who deserves lots of respect for writing SIDcog)

The biggest problem with my code is that I didn't spend much effort in getting the timing correct so it's a bit wonky.

NOTE the Arduino environment puts static tables in RAM, which is very limited especially on the Atmega168.  I would constantly get mysterious malfunctions, including the inability to upload new sketches - effecitvely "bricking" the Arduino.  This can be fixed by carefully removing and resetting the power using the jumper and timing the upload of a new sketch.  It took me quite a while to figure out the solution.

The solution is to ensure the music data is in program memory: using the PROGMEM keyword.  Its use is a bit involved, since one can't simply access it as arrays but has to explicitly copy it using special functions.  See the player app.

UPDATE: The files got moved to my homepage, I adjusted the links accordingly.

Tuesday, February 22, 2011

Arduino SIDshield initial schematic and code

This is the schematic for the Arduino SIDshield I've been working on, drawn using Eagle. This is NOT the circuit on the breadboard, since I don't have a couple of 74LS164's handy - instead, I used a pair of 74LS323's that are slightly more flexible.  They operate in a simple parallel out mode though.  Also, as mentioned in the previous post, the 1MHz clock is provided by a function generator buffered by a 74LS04.  Hence, regard this schematic as untested!

I still haven't gotten around adding the 5V-to-12V boost circuit.  I was planning on using the LT1109CZ-12 - a nice, small TO-92 packaged chip.  Unfortunately it's not easy to get, it seems.  My 6581 draws 27mA from the 12V supply, well within the limits promised bu Commodore (datasheet says 25mA typ, 40mA max).

Software

The library to drive the chip is a modification of the Spi library, reduced to the constructor and a single function.  I will add more functions later, for now all it does is take an address and data value and set the appropriate SID register.  This first version is on my website.  A simple sketch to test it:

#include <SID.h>

void setup()
{
  sid.setReg(24,15); // full volume
  sid.setReg(6,0xf0); // ADSR=0,0,15,0
  sid.setReg(1,0x1c); // set frequency to 440Hz
  sid.setReg(0,0xd6);
}

void loop()
{
  // .8s beep at 1s interval
  sid.setReg(4,17); // gate on
  delay(800);
  sid.setReg(4,16); // gate off
  delay(200);
}

Performance

The speed with which registers are written is pretty good.  I don't want to make it any shorter actually, since the chip select is not synchronized to the clock signal - so I have to make sure a few cycles happen during CS low.  The shift registers get loaded within 5us, and the CS signal is asserted for slightly less than that.  Overall the entire operation of setReg is about 15us.

More to come.
UPDATE: see here.

Thursday, February 17, 2011

Arduino SIDshield: it's ALIVE!!!!

My most recent little project is to make a good ol' Commodore SID chip (6581) be controlled by an Arduino.  The prototype is now functioning:
The breadboard with the Arduino, the SID chip, a couple of shift registers, and a clock buffer.
The complete setup requires a bit more hardware:
Ok, quite a bit of that stuff is redundant...
On the scope you can see the triangular wave I coaxed out of the chip, which was pulled from my first C64, bought back in 1984 or 1985 in Germany.

This weekend I will finalize the schematics, do a board layout and finish the library for the Arduino.  Note that the design is conceptually very similar to the MIDIbox SID module, but then there are only so many ways to attach a SID to a couple of shift registers.

The final version will use a crystal oscillator (replacing the function generator in the picture) for the 1MHz clock, and a DC-DC boost converter to generate the 12V for the SID (currently provided by the adjustable supply).

I will post the schematic, layout and code as soon as I'm done.

Saturday, February 12, 2011

Playing sounds from MATLAB on Unix

While I honestly don't know if it is still a problem with the latest versions of MATLAB, there has been a problem with the "sound()" function in MATLAB on Macs and Linux platforms with ALSA.  Here is a very simple script that works around the problem by simply creating a temporary wave file, then calling the appropriate command-line function to make the sound.  It's trivial to customize.

In contrast to the real "sound()" function, this one also doesn't block, and returns immediately.  Again, this is trivial to change (by removing the ampersand) but I like this behavior, especially useful when playing longer sound files.

function [ ] = usound( w, fs )
%USOUND Plays sound on ALSA-based linux machines or macs

if nargin < 2
    fs = 16000;
end

filename = ['/tmp/' getenv('USER') '_matplay.wav'];
wavwrite( w, fs, filename );
if ismac
    eval(['!afplay ' filename ' &']);
else
    eval(['!aplay ' filename ' &']);
end

Sunday, February 6, 2011

Voronoi Neighbors

For a current research project, I was considering the problem of finding the neighbors of some given quantization value, basically a method to figure out if two Voronoi regions share a border, where the quantizer is specified simply by the centroids. I wrote a quick and dirty script, but it doesn't work in all cases - the problem is actually quite difficult for vector quantizers.  However, I started without checking the literature, trying to come up with my own approach; now I know better! Below, my crack at the problem, followed by the better, faster and smarter method!

The initial approach
My approach is based on drawing a line between two centroids.  If I find a point on this line that does not get quantized to either of the centroids, I declare the two regions not neighbors.
In this figure, A and B are clearly neighbors, whereas C isn't.  Testing is done using a binary search: I sample the middle of the line, check if that point gets quantized to A or B - if to B, then pick the halfway point from the middle to A, keep going until either a non-A or B point is found or 10 iterations have been done.  Generally for most checks the algorithm stops at the first check (see A and C) only for the neighboring regions will all 10 iterations be computed.

Problem is, this doesn't work very well.  Let's remove D:

Clearly, C now is a neighbor of A, but the straight line is not where the boundary between A and C is located.  So much for that...

The proper way
I found the correct way of solving this problem by looking at how Voronoi diagrams are drawn by MATLAB: using Delaunay triangulation.  Then using MATLAB functions, the lists of neighbors for the centroids can be found by calling delaunay, then TriRep, then the edges method on the resulting structure.  Here is some sample code:


% create a quantizer
V = zeros(2,8);
V(:,1) = [ 0 0 ];
for n=2:8
   V(:,n) = [ sin(2*pi*(n-1)/8) cos(2*pi*(n-1)/8) ];
end
figure;
voronoi(V(1,:),V(2,:));
tri = delaunay(V(1,:),V(2,:));
tr = TriRep(tri,V(1,:)',V(2,:)');


The resulting edges array can now be examined and turned into a list of neighbors for each centroid.  This should scale to higher dimensions, but won't work for 1-D - but there, the neighboring quantizer region problem is trivial anyways.  (Note, I have the Signal Processing Toolbox, so I'm not sure all those functions are in default MATLAB.)

So while my initial quick bit of code didn't work, it did cause me to think about the problem a bit more deeply and I learned a bit about computational geometry.

Tuesday, January 18, 2011

Further adventures with Mercurial: Converting a repository from Subversion

I have been using Mercurial for a little while now, and have become accustomed enough to try converting my rather large Subversion repository I have sitting on my home server.  This has proven to be a bit challenging.

Mercurial tracks files only, not directories - it does track the location of files, but it is not possible to have an empty directory in a Mercurial repository (I have taken to creating empty hidden files as a workaround).  Apparently this causes problems for some of the conversion/interaction tools, such hgsvn.

After several tries of various things, I've had success with hgsubversion python extension.  However, installing in under Ubuntu (10.10, or Maverick Meerkat) is not completely trivial. Here is what's needed to make it work:

  1. To build a version of subvertpy newer than what's in the repository, install libsvn-dev and python-dev: sudo apt-get install libsvn-dev python-dev
  2. Download subvertpy from http://samba.org/~jelmer/subvertpy/, then build and install it locally. You need at least 0.7.4 (Ubuntu's repositories have 0.7.3).
  3. Finally, follow the instructions on http://mercurial.selenic.com/wiki/HgSubversion to install hgsubversion.  I moved it into /usr/local/lib.
Then, a new Mercurial repository can be cloned with (for example) hg clone svn+ssh://myhost.org/myrepo.  Although the HgSubversion site warns about memory leaks, I found this procedure quite well.

Thursday, January 13, 2011

Using MATLAB with simple single-threaded scripts on a cluster

McGill University is part of CLUMEQ, and it is relatively easy to gain access to the Krylov computer, a small(ish) system of 300 cores. While finishing up my thesis, I made some use of this cluster to run simulations in MATLAB.  Here are a few notes on efficiently using the system.

Initially, one would assume the best way to utilize the system is to use the Parallel Toolbox, and surely some applications can fit very well to this mold.  In my case, the parallelism within my code was very data-oriented and thus I couldn't get a great speedup.  Instead, I simply used the cluster as a set of easily queued single-thread computers.  A simple script turns a file of MATLAB commands into a series of queue submissions:

cat matcommands | while read line; do
        echo "#!/bin/bash" > temp.sh
        echo "#PBS -l nodes=1:ppn=1,walltime=1:00:00:00" >> temp.sh
        echo "#PBS -V" >> temp.sh
        echo "#PBS -N Bmatlab_s" >> temp.sh
        echo "cd WorkingDirectory" >> temp.sh

        echo "matlab -nojvm -nodisplay -nodesktop -nosplash -r \"" $line '"' >> temp.sh

        msub temp.sh
done

The "matcommands" file is simply a series of single lines of
script(arguments); exit();
and so on; these will be executed in parallel independently of each other. Very handy if testing a script with varying data.  The script must be written such that the output is saved to a file whose name depends on the arguments.  I then would download all the result files to my desktop and analyze everything there.

This method of using MATLAB on the cluster also works around the restriction that Krylov only has a 16-cpu license for the Parallel toolbox.  Instead, 30 jobs would typically be processed at the same time (which I assume is simply a local policy restriction).

Wednesday, January 5, 2011

Netbook!

A new addition to my menagerie of computers at home, I have gotten myself a netbook.  I haven't had a laptop since I sold my Mac Powerbook G4, opting instead for a Mac Mini: I had been using the PB effectively as a desktop anyways, on a pedestal with an external keyboard and mouse.

On our last trip to the in-laws in Kitchener, this created a problem, of course: I was still working on my thesis, so I used Madeline's Macbook, much to her annoyance; she has been pushing me to get a portable ever since.  I maintain that the primary purpose of a portable is to be portable - if I need power, I use a desktop, or connect remotely to one!  Thus a netbook is the best choice for me.

I just bought a Asus EEE 1000HE, used but effectively new - let someone else pay the initial depreciation!  This was chosen in part for its Linux compatibility, but the EEE's also have a pretty good reputation as far as netbooks are concerned (without being super expensive).  I named it Earendil (it should have an umlaut on the a).

There is very little that needs to be done to make it all work: I found I had to disable a few modules from being loaded to make sure the wireless resumes after waking from suspend. A fix was posted here: http://www.twentyways.com/2010/11/ (basically a few lines to add to /etc/modprobe.d/blacklist.conf)  It's a bit noisy, since the fan effectively runs all the time, but not excessively so.

I did manage to mess the install up once already though, losing the ability to suspend.  Trying to get the CPU to truly idle (such that the fan can turn off), I installed eee-applet, powertop, and some other packages - and something messed things up.  Even apt-get purge in reverse order didn't fix it - I ended up reinstalling.  I might try again with more care (and backups!)